Tutorial 2: Arduino Interfacing with LCD
In this tutorial, you will learn how to wire up and use an alpha numeric LCD display. The display has an LED back light and can display two rows with up to 16 characters on each row. You can see the rectangles for each character on the display.
The interface consists of the following pins:
A register select (RS) pin that controls where int the LCD memory you are writing data to. You can select either the data register which holds what goes on the screen, or an instruction register, which holds the intsructions to initialize the LCD
A read/write(R/W) pin that selects the reading or writing mode.
A Enable pin that enables writing to the registers.
8 data pins(D0-D7) to read from and write data to.
There's also a display contrast pin(Vo) , power supply pins(+5V, GND) and LED Back- light pin(Bklt+, Bklt-) pins that you can use to power the LCD, control the display contrast, and turn ON and OFF the LED back light, resp.
Hardware Required:
Arduino Board
LCD screen (16x2)
Pin Headers
Breadboard
Hook up wire
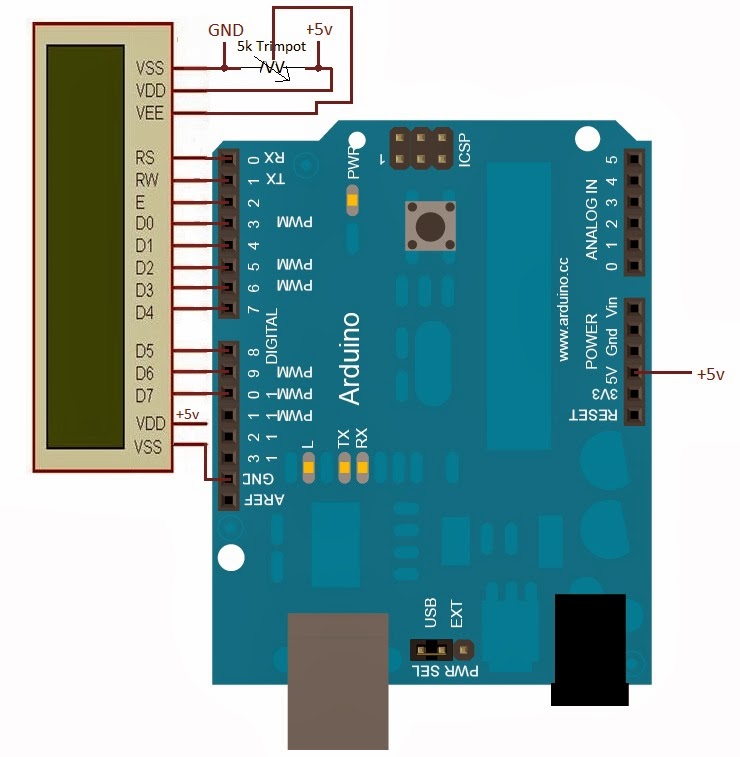
Circuit Connection:
To wire you LCd screen to your Arduino, connect the following pins:
LCD RS pin to digital pin 12
LCD RW pin to GND
LCD Enable pin to digital pin 11
LCD D4 pin to digital pin 5
LCD D5 pin to digital pin 4
LCD D6 pin to digital pin 3
LCD D7 pin to digital pin 2
LCD pin 3(Vss) to 3V supply
LCD pin 2(Vcc) to 5V supply
or you can wire a 10K potentiometer to 5V and GND, with its wiper output to LCD PIN 3.
 |
| LCD connection with Arduino |
Download the code:
For better Understanding of the Arduino LCD Library, refer this page:
No comments:
Post a Comment